Creating a brick sidewalk can dramatically improve the curb appeal and functionality of your property. For homeowners in Kitchener, Waterloo, and Cambridge, a well-constructed brick pathway not only adds charm but also offers durability that lasts for years. While professional help is always an option, with the right planning and tools, building a sidewalk with bricks can be a manageable DIY project.
Step 1: Plan Your Path
Before you lay a single brick, you need a clear plan. Decide on the width, length, and shape of your sidewalk. Most residential pathways are between 3 to 4 feet wide, which allows comfortable walking space. Use garden hoses or stakes and string to outline the route of your sidewalk. This helps visualize the final shape and ensures straight or smoothly curved edges.
Step 2: Prepare the Ground
Excavating the area is crucial for stability. Remove grass, soil, and any debris to a depth of 6 to 8 inches. Ensure the ground is level, but slightly sloped away from your house for proper drainage. A gravel base provides a solid foundation and helps prevent shifting over time. Spread 3 to 4 inches of gravel, then compact it using a hand tamper or plate compactor.
Step 3: Add a Sand Layer
On top of the gravel, add 1 to 2 inches of coarse sand. The sand acts as a bed for the bricks, making it easier to adjust their placement. Rake the sand to level it, and lightly mist with water to settle it before laying the bricks.
Step 4: Lay the Bricks
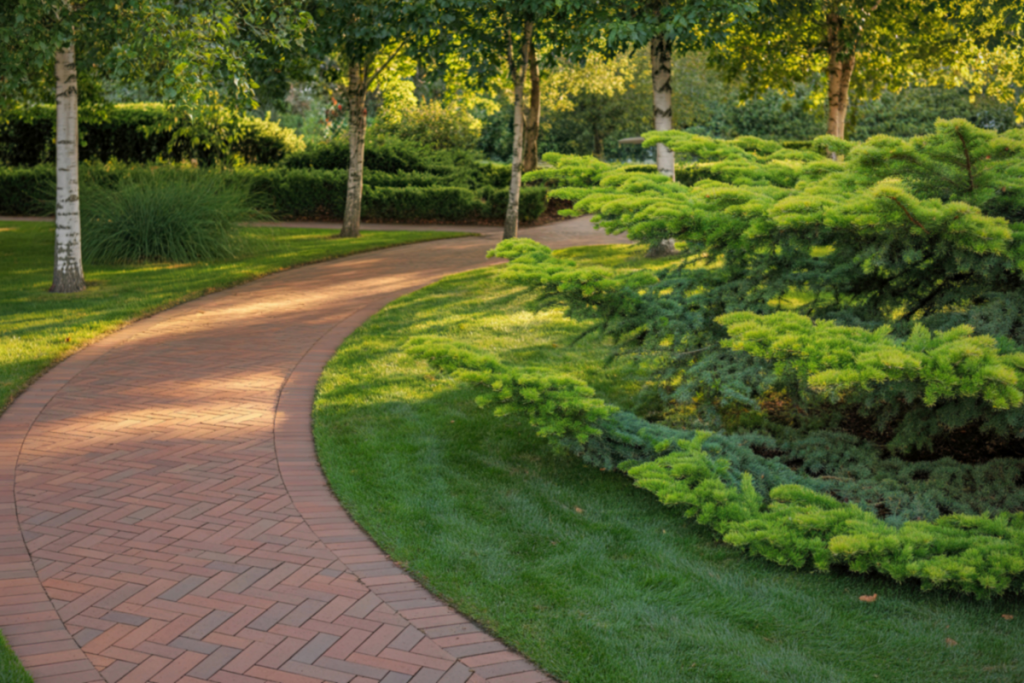
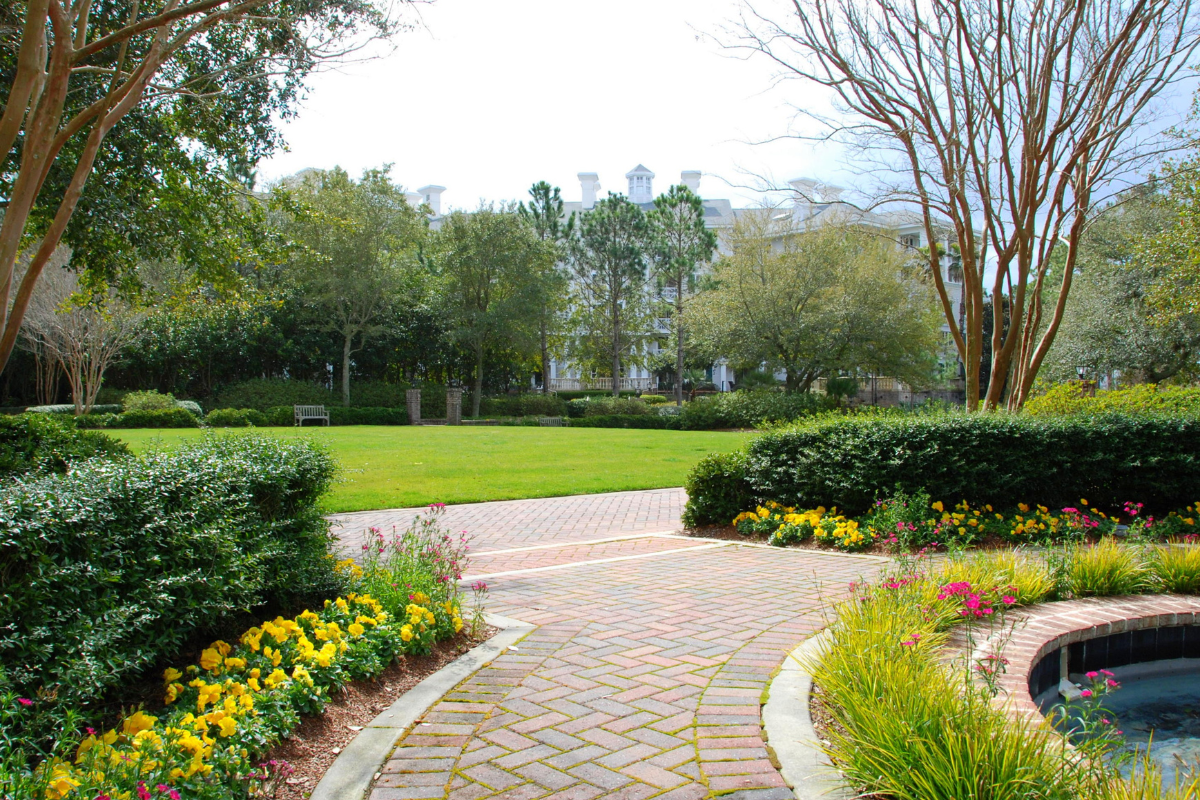
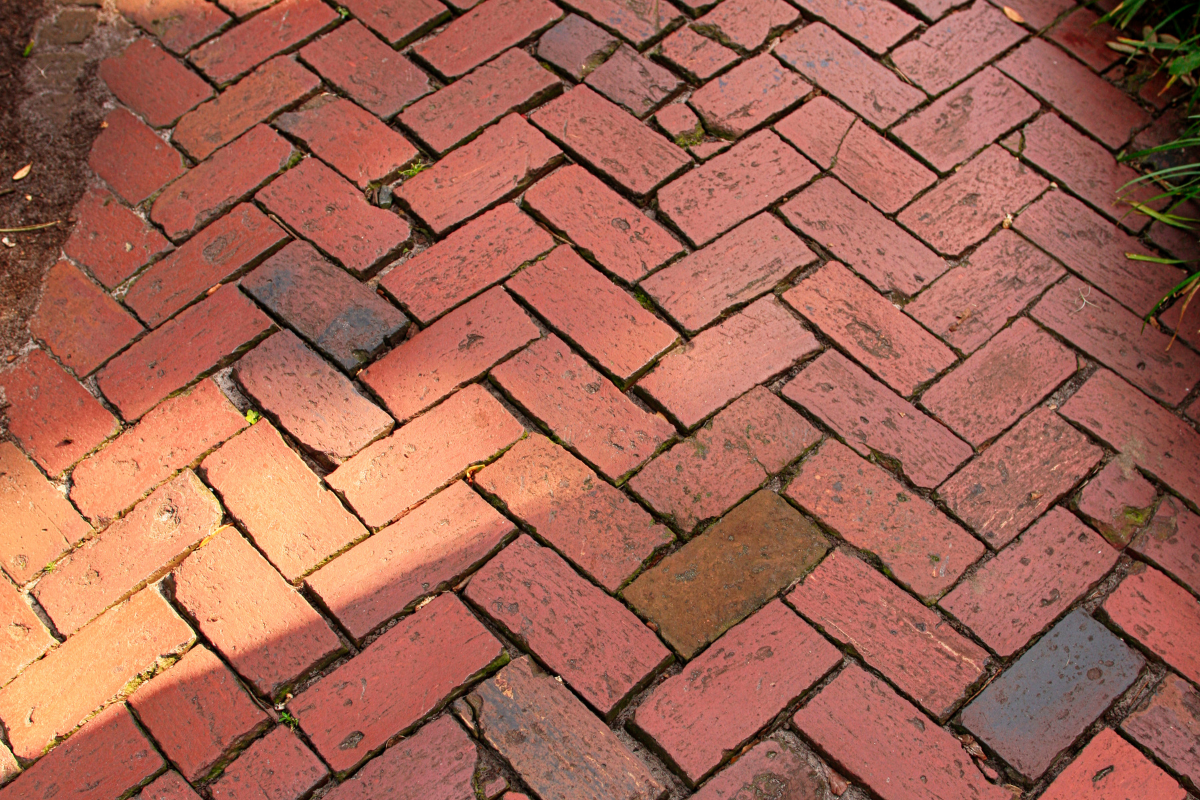
Start at one end of the path and lay bricks in your chosen pattern. Herringbone, basket weave, and running bond are popular options. Maintain consistent spacing of about 1/8 inch between bricks. Use a rubber mallet to tap bricks into place, ensuring they sit firmly on the sand base.
Step 5: Edge the Sidewalk
Installing edging along the sides keeps bricks from spreading over time. Plastic, metal, or concrete edging can be secured along the perimeter. This step is especially important in areas with heavy foot traffic or frequent freeze-thaw cycles common in Southwestern Ontario.
Step 6: Fill the Joints
Once all bricks are in place, spread sand over the surface and sweep it into the joints. This locks the bricks together and prevents shifting. For added durability, consider using polymeric sand, which hardens when moistened and resists erosion.
Step 7: Compact and Finish
Finally, compact the entire sidewalk with a plate compactor to settle the bricks and sand. Check for uneven spots and adjust as needed. Lightly mist the walkway with water to help the sand settle into the joints completely. With proper maintenance, a brick sidewalk can last decades, offering a charming addition to your home’s exterior.
If you prefer professional assistance, hiring an expert home renovation team or contractor for remodelling ensures the job is done efficiently and meets local standards. Professionals can manage grading, drainage, and brick selection, saving time and avoiding common DIY mistakes.
Building a brick sidewalk is a practical way to enhance both the look and functionality of your property. Whether tackling the project yourself or enlisting a skilled contractor, proper preparation and attention to detail are key. Residents in Kitchener, Waterloo, and Cambridge can enjoy the timeless appeal and durability of a well-laid brick path for years to come.